Over the past few months I have made a few improvements to my Rostock Mini 3D printer, which has greatly improved the quality of its prints and ease of use. For example, one of the additions is a Bluetooth interface which doesn’t require any firmware support.
Metal pulleys
After a few weeks of printing with my Rostock Mini, I noticed a drastic reduction in print quality. After some investigation the main culprit turned out to be the pulleys. The pulleys I was originally using are the ones shown in the picture below. They consist of a plastic part pushed over a metal axis. The metal part has a slight bulge on the axis, to keep the plastic on by friction. If you look closely, you can see the bulge in the picture.
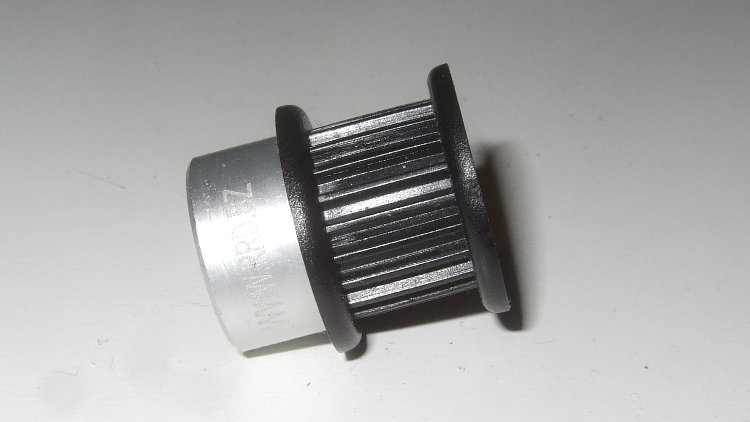
Unfortunately, the bulge is way too large. First of all, this leads to the pulley being stretched, so the dimensions aren’t quite what they should be anymore. I didn’t really notice any problems due to this, but it might be if you are printing parts which require high precision and accuracy. The bigger problem though is that eventually the plastic part simply breaks due to too high internal stresses. It then starts spinning on the metal axis, leading to the same symptoms as a stepper motors skipping steps.
I initially tried salvaging the pulleys by grinding down the bulge on the metal axis and gluing the plastic back onto it. Because I don’t have a lathe, that didn’t really work out though, the pulleys were all out of center. So I replaced the plastic pulleys with aluminum ones, which fixed all problem and improved print quality as well.
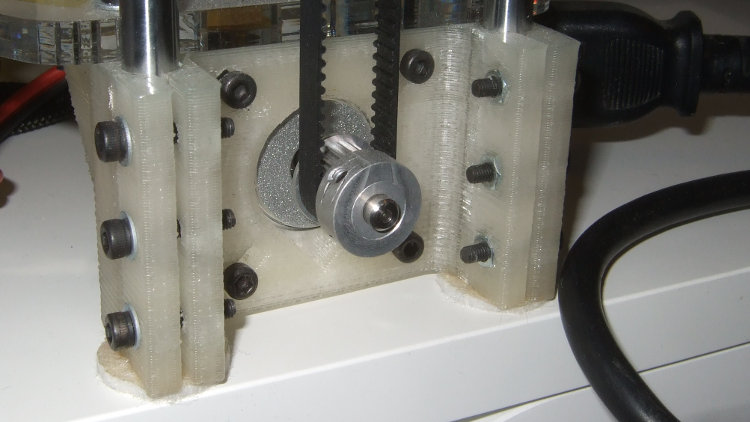
Geared extruder
Now and then, after a few hours of printing, my extruder, an Airtripper v3, would start slipping. Of course this lead to many failed prints and wasted hours. Increasing the tension on the filament, or replacing the toothed gear, didn’t really help matters, so at the suggestion of a friend, PJ, I switched to a planetary geared stepper motor.
The model I’m using is a 17HS19-1684S-PG5. It’s a fairly common model with a 5.18:1 reduction and 2Nm maximum torque. It’s being sold by quite a few shops, I got mine from fabber-parts. The extruder I’m using is a slightly modified version of the Makergear Filament drive goes Bowden one.
This change completely fixed the slipping problems and allowed two successive 13 hour prints without any problem whatsoever. Below is an example of a nice 0.1mm layer 12 hour print, which always failed before upgrading the pulleys and extruder.
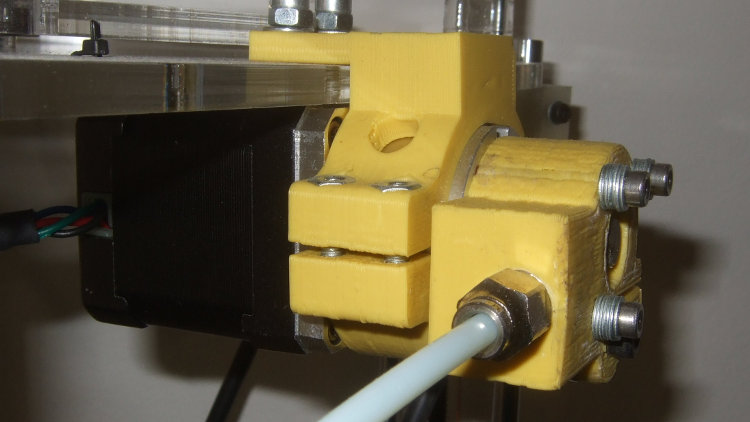
Calibration Probe
The newest versions of the Marlin firmware for delta printer supports the addition of a probe to let the printer self-calibrate. The printer touches the probe down on the printbed in several locations, which allows it to create a model of the printbed. This model is then used to make the hotend move perfectly level to the bed at all locations, and ensures a perfect first print layer.
Johann Rocholl published a design for a probe holder for his Kossel printer, which I modified to fit my larger Rostock hotend holder and microswitch model. I had to modify the firmware somewhat to support the Sanguinololu controller I’m using. While I was at it, I also made some additions so the printer won’t start probing and printing before the probe is respectively deployed and retracted.

Unfortunately, some part of the software doesn’t seem to be playing along. Having my printer self-calibrate actually greatly reduces the print quality. So until I can figure out what exactly is going wrong, the probe remains unused.
Bluetooth
My printer occupied quite a lot of my desk space, so I wanted to put it on a shelf. However, that moves it too far away to connect to it with a USB cable, so a wireless solution was required. Bluetooth seemed an obvious choice because of its widespread support.
The printer’s controller board is a Sanguinololu, which has a header to which a Bluetooth module can be connected. However, this also requires software support, which would limit my choice of firmware. More importantly, I was using some of those header pins for the self-calibration probe. So, using the extension header was not an option.
I already had some HC-05 Bluetooth modules lying around, which I got on eBay. These modules have a serial output, which can be set to any baud rate. What I wanted was some way to have the BT module take over the serial interface to the Sanguinololu’s microcontroller whenever a connection was established. Looking at the USB to serial interface, an FTDI FT232RL, this turned out to be possible.
The FT232 has a reset input, which tri-states its serial port lines as long as it is held low. This allows you to create a wired OR on the serial lines, given that the module you are OR’ing the connection with also tri-states its lines when it’s disabled. Luckily, the HC-05 module does exactly that. It also has a state output that goes high whenever a connection is established. Bingo!
All that is needed to create a seamless BT integration with the Sanguinololu is inverting the HC-05’s state output and connecting it to the reset pin of the FT232RL, and connecting together the FT232RL’s and the HC-05’s serial port lines. I made a small adapter board to do that, which is plugged into a serial port header under the Sanguinololu’s USB connector. The connection to the FT232RL’s reset pin is made with a short length of teflon-coated 30 AWG wire. No changes to the Sanguinololu PCB are required, since the FT232RL’s reset line is left floating by default.
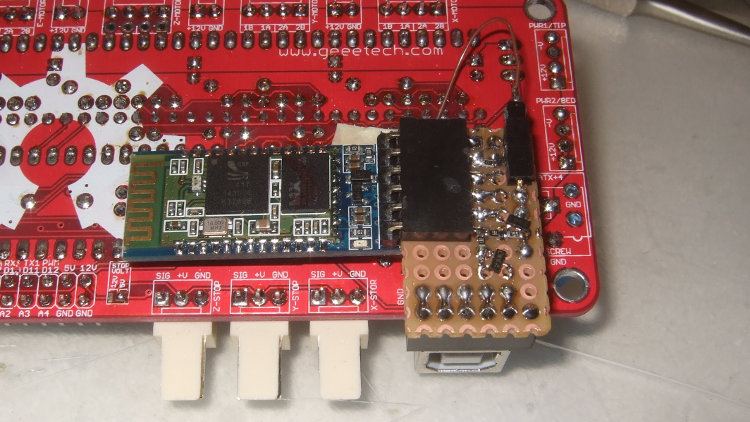
One possible addition is a circuit to reset the printer every time a BT connection is established, though I haven’t had a need for it so far. The interface works really nice, and no firmware modification whatsoever is needed. A lot more free space on my desk and one cable less hanging around!